WPFの描画関係メモ
描画関係、仕事では滅多に使わないのだけど、
その分毎回忘れてしまうのでこの記事でメモ
とにかく線を引いてみる
Lineクラスをそのまま使うことも出来るけど、
多少込み入った描画方法も習得したいならPathを覚えた方が良さそう。
(その分重いみたいだが・・・)
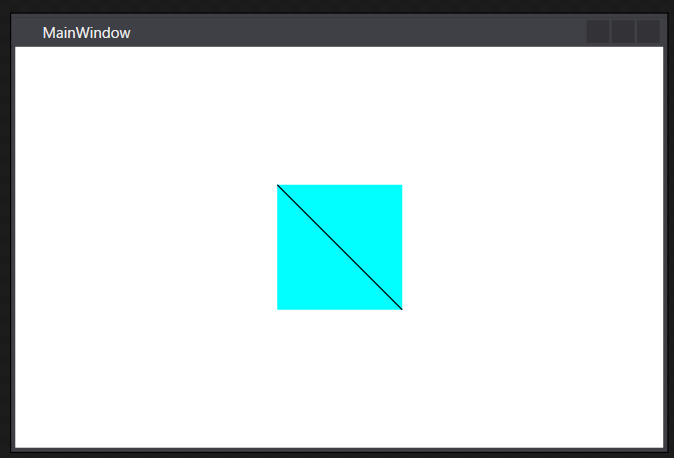
<Window x:Class="WpfApp1.MainWindow"
        xmlns="http://schemas.microsoft.com/winfx/2006/xaml/presentation"
        xmlns:x="http://schemas.microsoft.com/winfx/2006/xaml"
        xmlns:d="http://schemas.microsoft.com/expression/blend/2008"
        xmlns:mc="http://schemas.openxmlformats.org/markup-compatibility/2006"
        xmlns:local="clr-namespace:WpfApp1"
        mc:Ignorable="d"
        Title="MainWindow" Height="350" Width="525">
    <Canvas
        Height="100"
        Width="100"
        Background="Aqua"
        >
        <Path
            Stroke="Black"
            >
            <Path.Data>
                <LineGeometry
                    StartPoint="0,0"
                    EndPoint="100,100"
                    />
            </Path.Data>
        </Path>
    </Canvas>
</Window>
複数の線を引く
GeometryGroupの中に描画したいGeometryを追加して行けば良い。
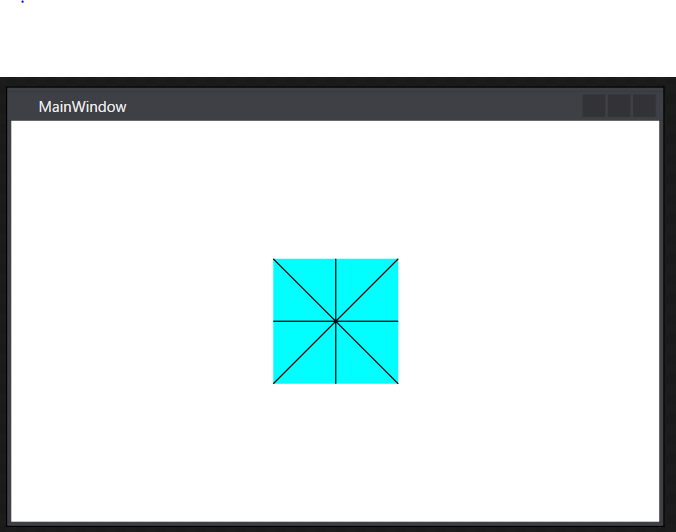
<Window x:Class="WpfApp1.MainWindow"
        xmlns="http://schemas.microsoft.com/winfx/2006/xaml/presentation"
        xmlns:x="http://schemas.microsoft.com/winfx/2006/xaml"
        xmlns:d="http://schemas.microsoft.com/expression/blend/2008"
        xmlns:mc="http://schemas.openxmlformats.org/markup-compatibility/2006"
        xmlns:local="clr-namespace:WpfApp1"
        mc:Ignorable="d"
        Title="MainWindow" Height="350" Width="525">
    <Canvas
        Height="100"
        Width="100"
        Background="Aqua"
        >
        <Path
            Stroke="Black"
            >
            <Path.Data>
                <GeometryGroup>
                    <LineGeometry
                        StartPoint="0,0"
                        EndPoint="100,100"
                        />
                    <LineGeometry
                        StartPoint="100,0"
                        EndPoint="0,100"
                        />
                    <LineGeometry
                        StartPoint="50,0"
                        EndPoint="50,100"
                        />
                    <LineGeometry
                        StartPoint="0,50"
                        EndPoint="100,50"
                        />
                </GeometryGroup>
            </Path.Data>
        </Path>
    </Canvas>
</Window>
円・楕円
円、楕円は中心の座標とX軸の半径、Y軸の半径を指定する。
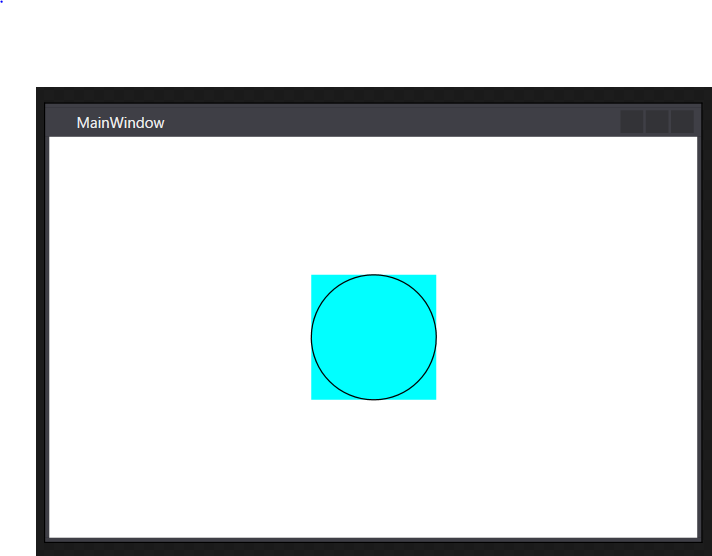
<Window x:Class="WpfApp1.MainWindow"
        xmlns="http://schemas.microsoft.com/winfx/2006/xaml/presentation"
        xmlns:x="http://schemas.microsoft.com/winfx/2006/xaml"
        xmlns:d="http://schemas.microsoft.com/expression/blend/2008"
        xmlns:mc="http://schemas.openxmlformats.org/markup-compatibility/2006"
        xmlns:local="clr-namespace:WpfApp1"
        mc:Ignorable="d"
        Title="MainWindow" Height="350" Width="525">
    <Canvas
        Height="100"
        Width="100"
        Background="Aqua"
        >
        <Path
            Stroke="Black"
            >
            <Path.Data>
                <EllipseGeometry
                    Center="50,50"
                    RadiusX="50"
                    RadiusY="50"
                    />
            </Path.Data>
        </Path>
    </Canvas>
</Window>
四角形
四角形はRectプロパティにX軸の始点、Y軸の始点、X軸の幅、Y軸の幅を指定する。

<Window x:Class="WpfApp1.MainWindow"
        xmlns="http://schemas.microsoft.com/winfx/2006/xaml/presentation"
        xmlns:x="http://schemas.microsoft.com/winfx/2006/xaml"
        xmlns:d="http://schemas.microsoft.com/expression/blend/2008"
        xmlns:mc="http://schemas.openxmlformats.org/markup-compatibility/2006"
        xmlns:local="clr-namespace:WpfApp1"
        mc:Ignorable="d"
        Title="MainWindow" Height="350" Width="525">
    <Canvas
        Height="100"
        Width="100"
        Background="Aqua"
        >
        <Path
            Stroke="Black"
            >
            <Path.Data>
                <RectangleGeometry
                    Rect="20,20,60,60"
                    />
            </Path.Data>
        </Path>
    </Canvas>
</Window>
塗りつぶし
PathクラスのFillプロパティにブラシを指定することで塗りつぶし
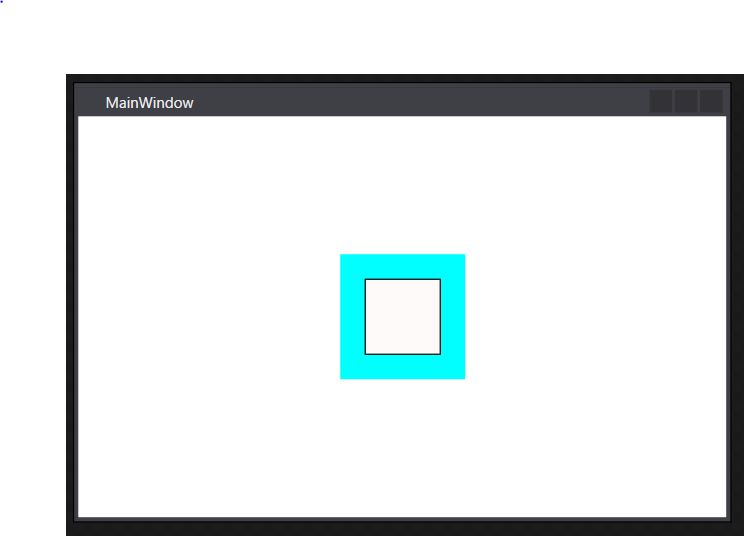
<Window x:Class="WpfApp1.MainWindow"
        xmlns="http://schemas.microsoft.com/winfx/2006/xaml/presentation"
        xmlns:x="http://schemas.microsoft.com/winfx/2006/xaml"
        xmlns:d="http://schemas.microsoft.com/expression/blend/2008"
        xmlns:mc="http://schemas.openxmlformats.org/markup-compatibility/2006"
        xmlns:local="clr-namespace:WpfApp1"
        mc:Ignorable="d"
        Title="MainWindow" Height="350" Width="525">
    <Canvas
        Height="100"
        Width="100"
        Background="Aqua"
        >
        <Path
            Stroke="Black"
            Fill="Snow"
            >
            <Path.Data>
                <RectangleGeometry
                    Rect="20,20,60,60"
                    />
            </Path.Data>
        </Path>
    </Canvas>
</Window>
交差部分の塗りつぶし
GeometryGroupのFillRuleプロパティによって交差する図形の描画方法が変わる。
GeometryGroup.FillRule プロパティ (System.Windows.Media)
↑ぱっと読んだだけでは理解出来ず・・・
EvenOdd⇒交差する部分を塗りつぶししない?
NonZero⇒交差する部分を塗りつぶす?
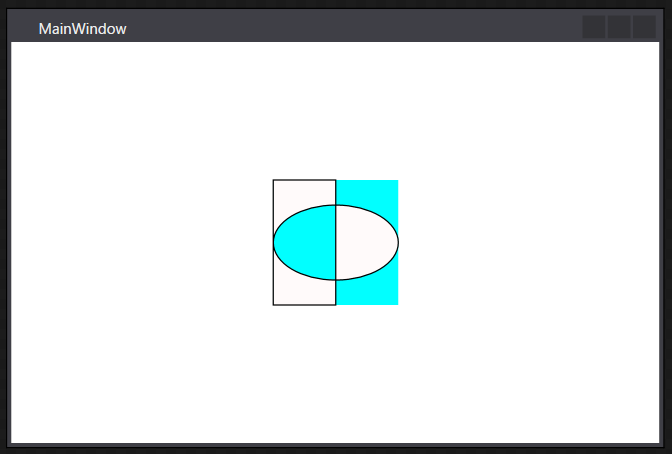
<Window x:Class="WpfApp1.MainWindow"
        xmlns="http://schemas.microsoft.com/winfx/2006/xaml/presentation"
        xmlns:x="http://schemas.microsoft.com/winfx/2006/xaml"
        xmlns:d="http://schemas.microsoft.com/expression/blend/2008"
        xmlns:mc="http://schemas.openxmlformats.org/markup-compatibility/2006"
        xmlns:local="clr-namespace:WpfApp1"
        mc:Ignorable="d"
        Title="MainWindow" Height="350" Width="525">
    <Canvas
        Height="100"
        Width="100"
        Background="Aqua"
        >
        <Path
            Stroke="Black"
            Fill="Snow"
            >
            <Path.Data>
                <GeometryGroup FillRule="EvenOdd">
                    <RectangleGeometry
                        Rect="0,0,50,100"
                        />
                    <EllipseGeometry
                        Center="50,50"
                        RadiusX="50"
                        RadiusY="30"
                        />
                </GeometryGroup>
            </Path.Data>
        </Path>
    </Canvas>
</Window>
交差部分の塗りつぶし(CombinedGeometry)
CombinedGeometryを使うと交差部分の扱いがもう少し理解しやすい。
WPFでプログラムしてみよう(6) - 子持ちししゃもといっしょ
参考にさせていただくと、
CombinedGeometryはGeometry1とGeometry2の二つの要素の合成であり、
GeometryCombineModeで交差部分の処理を切り替えることが出来る様子。
Exclude⇒Geometry1からGeometry2の交差部分を除いた領域を描画
Intersect⇒交差部分のみ描画
Union⇒全ての領域を描画
Xor⇒交差部分以外を描画
さっきと同じ結果だが、CombinedGeometryで書き換えると以下のようになる

<Window x:Class="WpfApp1.MainWindow"
        xmlns="http://schemas.microsoft.com/winfx/2006/xaml/presentation"
        xmlns:x="http://schemas.microsoft.com/winfx/2006/xaml"
        xmlns:d="http://schemas.microsoft.com/expression/blend/2008"
        xmlns:mc="http://schemas.openxmlformats.org/markup-compatibility/2006"
        xmlns:local="clr-namespace:WpfApp1"
        mc:Ignorable="d"
        Title="MainWindow" Height="350" Width="525">
    <Canvas
        Height="100"
        Width="100"
        Background="Aqua"
        >
        <Path
            Stroke="Black"
            Fill="Snow"
            >
            <Path.Data>
                <CombinedGeometry
                    GeometryCombineMode="Xor"
                    >
                    <CombinedGeometry.Geometry1>
                        <RectangleGeometry
                            Rect="0,0,50,100"
                            />
                    </CombinedGeometry.Geometry1>
                    <CombinedGeometry.Geometry2>
                        <EllipseGeometry
                            Center="50,50"
                            RadiusX="50"
                            RadiusY="30"
                            />
                    </CombinedGeometry.Geometry2>
                </CombinedGeometry>
            </Path.Data>
        </Path>
    </Canvas>
</Window>